|
In Dundee, Scotland, on the left side of the University Campus, there is a garden. Where Blueberries, Apples, Currants, and Plums grow. Previously unlabeled, people might wander in for a picnic, unaware that all the plants around them were edible. As part of my MFA project, I painted a mural on the back of the garden with the intention of helping the Dundee community access fresh food. 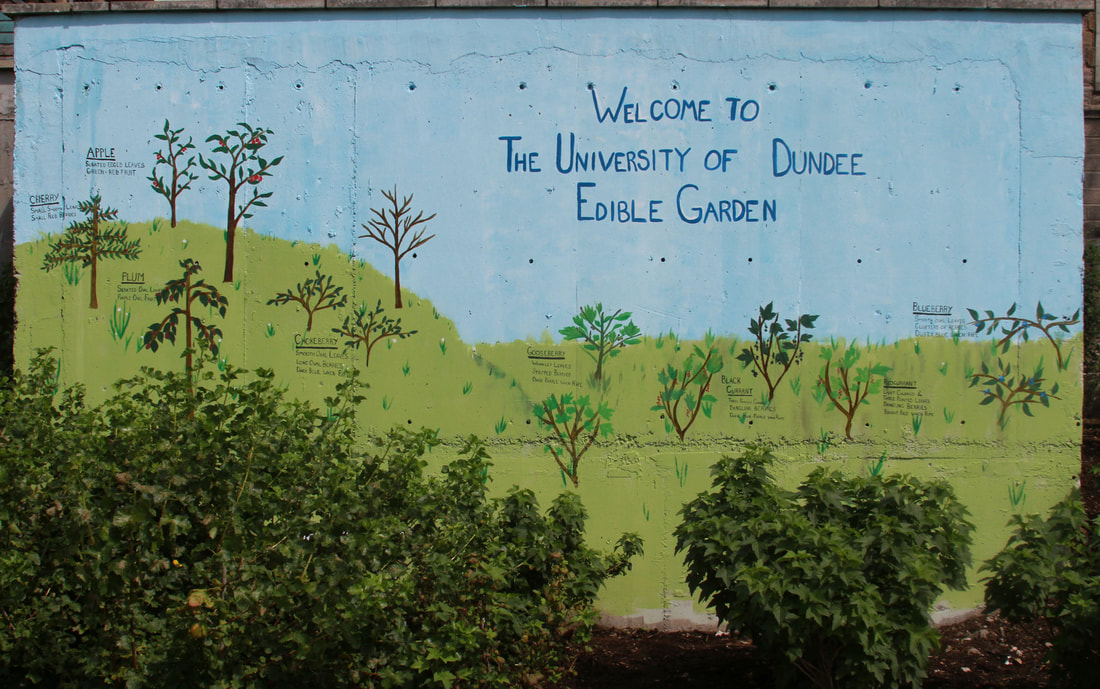 My project quickly gained attention from the University, resulting in an article on the website. However, apparently too much attention is a bad thing. Following the article, a local news site did a story on the Edible Garden which was wildly popular, liked and shared over 200 times within 5 hours of being posted. I woke-up joyful and filled with pride, only to check my email and find an angry message. Apparently, the garden isn't public access and was created for staff and students, the gate would be locked unless I got the video taken down and issued an apology to the landscaping staff. Signs were re-worded and the video was quickly taken down, but my frustration towards the University administration continued to bubble. 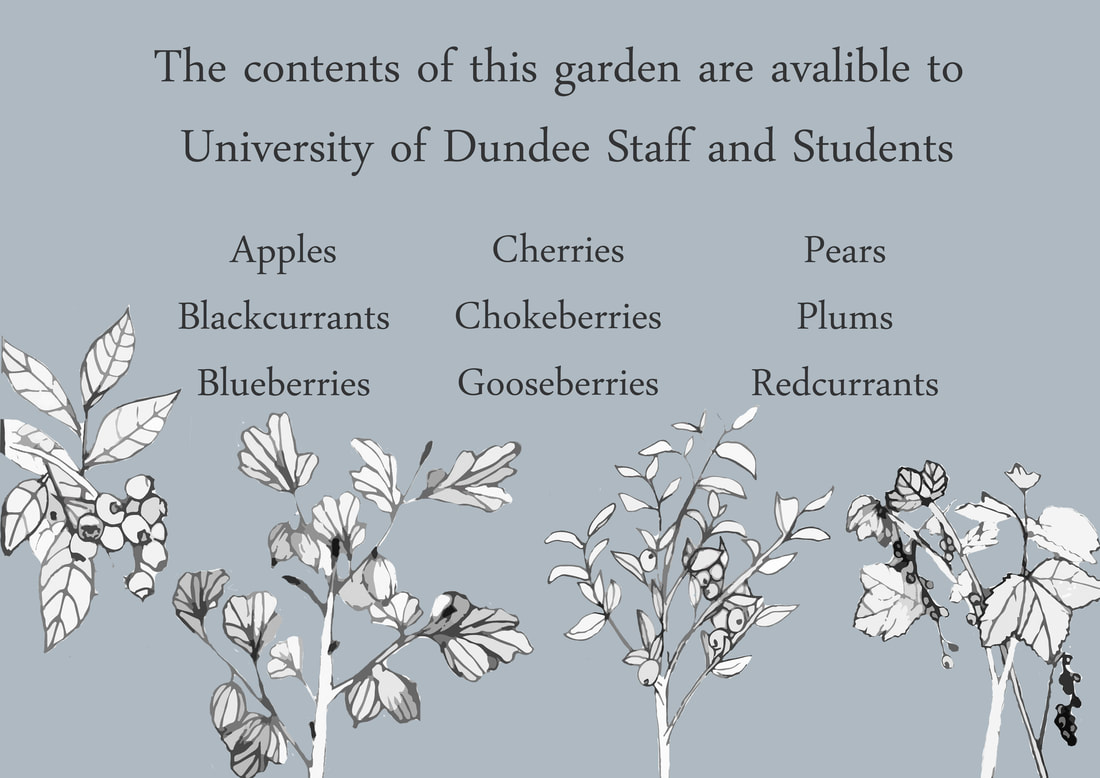 I never finished the mural. I couldn't stand to see a garden filled with food, which would ultimately rot because not enough people from the University used it, be cordoned off from the public. The location of the garden is next to a community fridge where people can get food not offered at food banks, perfect to help a group of people in desperate need for fresh fruits and vegetables. The opportunity to educate people about their food system sits, seldom used.
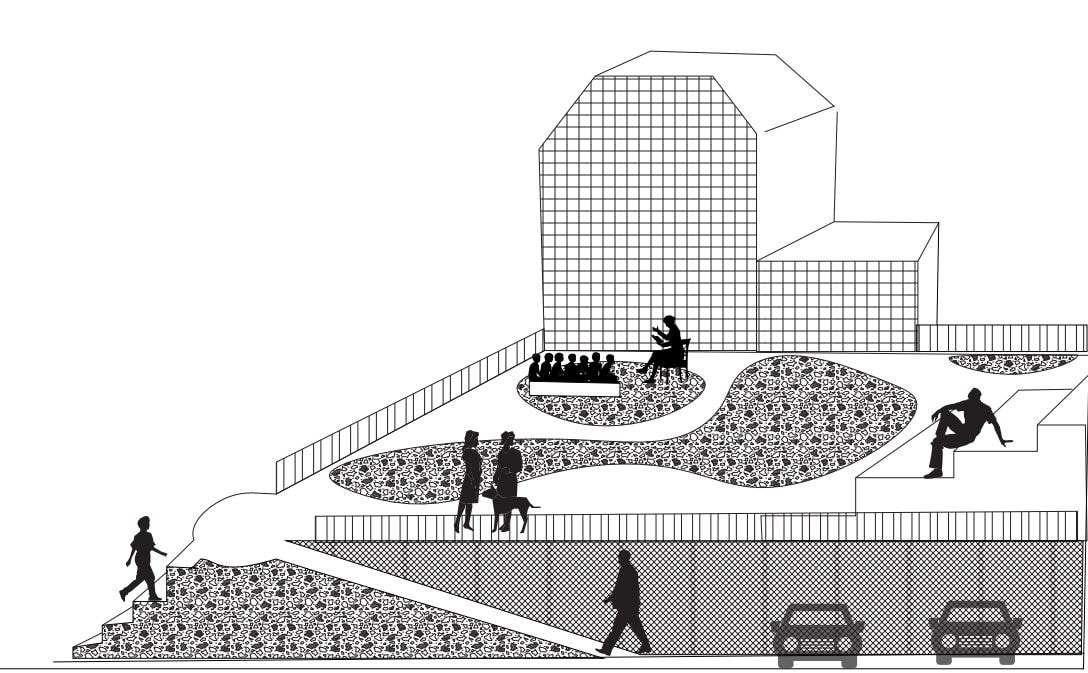
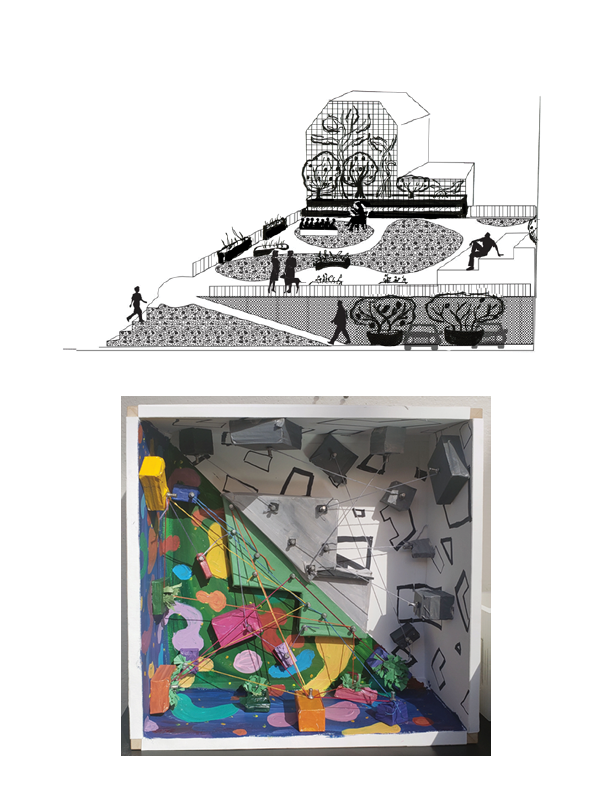
I hope my mural has helped more people discover the edible landscape behind the foreboding green fence surrounding it. Similar to many cities, Dundee is filled with flat roofs and empty walls. Creative and intentional infrastructure is one of the ways humans can learn to live with the natural world instead of against it. These images show what University of Dundee (above) and the City of Dundee (below) would look like if all the flat roofs were converted into living roofs. The left image is an aerial photograph, the right is a laser cut image with holes where plants could grow with proper infrastructure. 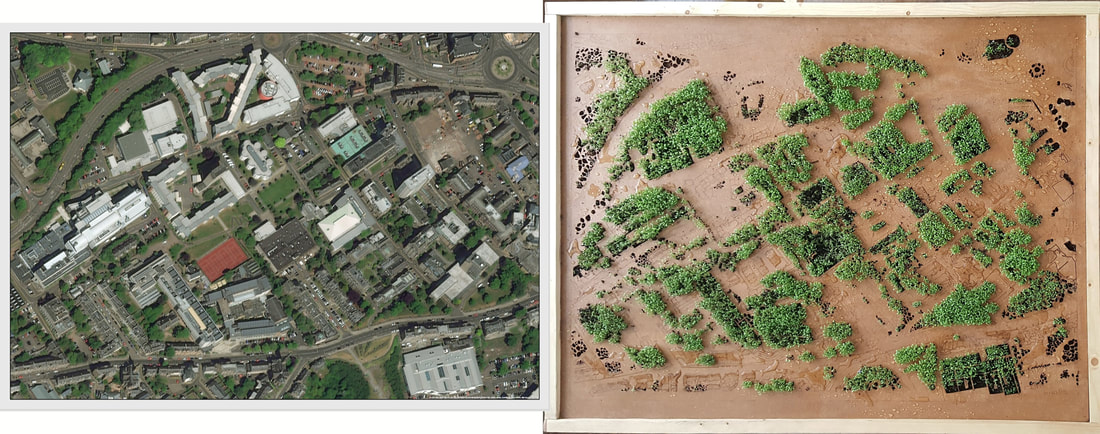 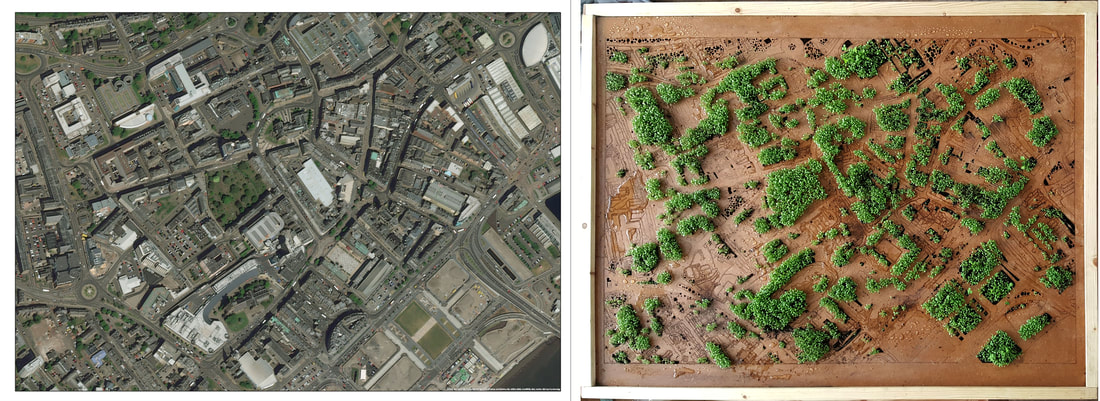 A living roof can be anything as large-scale as a garden, or as low maintenance as a sedum roof. The pieces shown on the right are a part of my show, Changing Anthropogenic Intention, and will be on view at the University of Dundee Master's show.  The final semester of my MFA in Arts and Humanities at Dundee University is beginning and with it comes a great change to my artwork. I am now self identifying as an Environmental Artist. As climate change becomes an increasingly prominent issue in everyday life, I have moved towards creating artwork which serves a purpose beyond aesthetics, but also does something to decrease the impact humankind has had on the planet Earth. 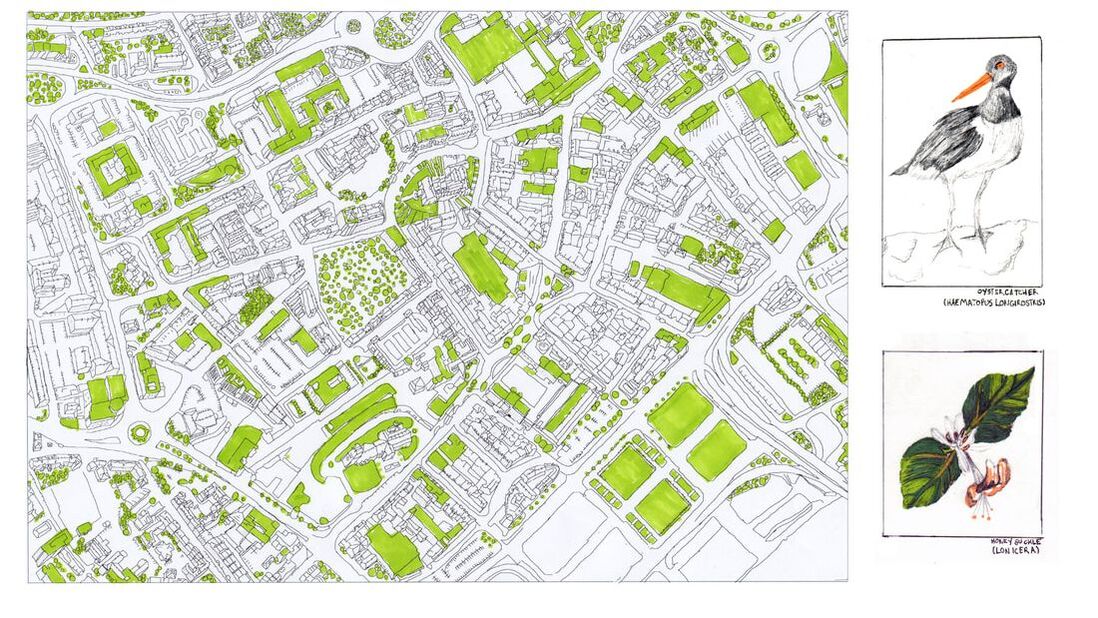 The aim of my final show is to show Dundee City council and community that natural plants and urban environments can coexist. Currently, landscaping is a second thought, often focusing on aesthetic improvements to unused land in-between man-made structures. However, following in the footsteps of environmental artists such as Agnes Denes and Joseph Beuys, and stated eloquently in Yuriko Saito’s Everyday Aesthetics, “In some environmental art works, the aesthetic and the practical are inseparable. Many of today’s environmental artists are committed to improving the state of the world in the most literal sense...Artist’s projects integrate their artistic design, such as geometrical figures or figurative images, with the actual clean-up of the site, as well as the restoration of native plants, providing a habitat for indigenous creatures ” (Saito, 31). The intention of creating purposeful aesthetic improvements to urban environments is pragmatic, utilizing creative problem solving to tackle multiple issues of urban life such as pollution, lack of green-spaces, habitat loss, etc, with beautiful solutions. In Dundee, there are already groups such as Bonnie Dundee and Open/Close Dundee who work to make Dundee as beautiful and environmentally friendly as possible, however working through bureaucracy deters even the most hopeful individuals. Though it is near impossible to create large scale change as an individual, I hope that through this three-tier project, I can add a small drop in the bucket of aesthetic and environmental improvements to the city of Dundee.  Woah!! I Moved to Dundee Scotland to pursue a Masters in Fine Art and Humanities! So far, I've been spending a lot of time playing around with natural dye. It all started with some rotting beets and I was reminded that plants make the most beautiful colors. Red Cabbage, Spinach, Clementine peels. I remember during my undergrad loving the details cyanotype could pick up in the bones. So I've been following up with natural dye on bones! So far It has been so much fun and I can't wait to keep exploring this technique! 
Post Grad life has been filled with moving to Salt Lake City, Utah and creating a small studio in the basement of our charming rental house.
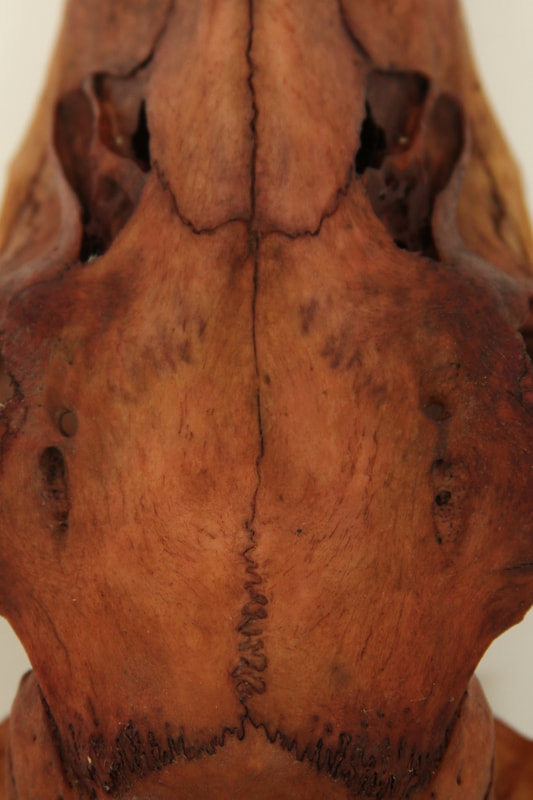
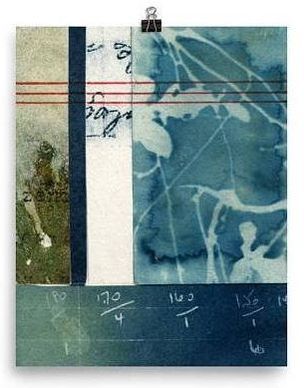
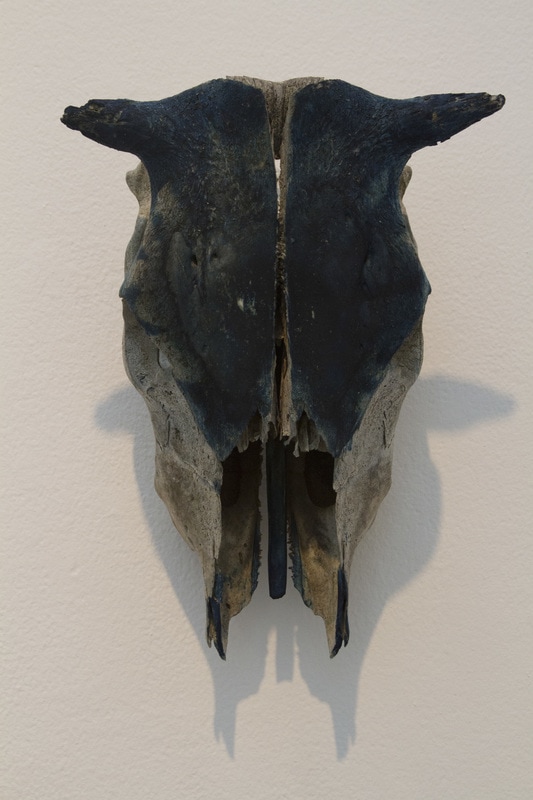
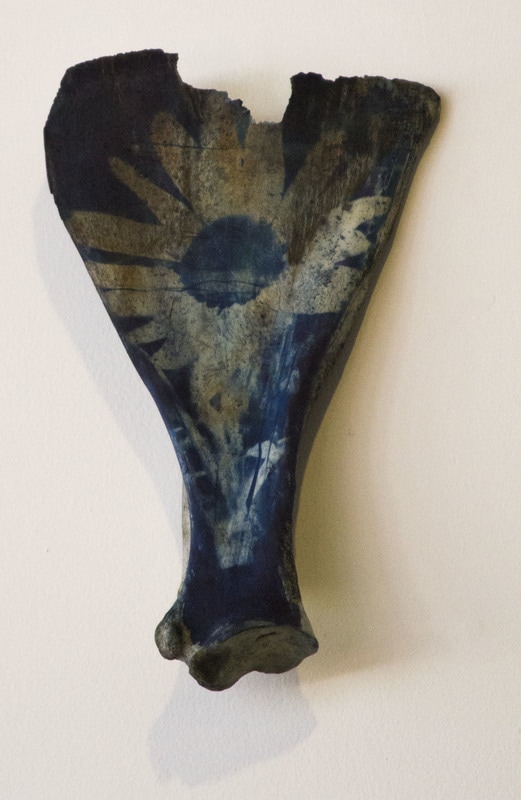
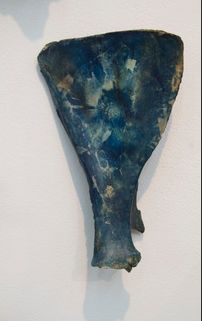
In it, I have been scouring Natural Color: Vibrant Plant Dye Projects for Your Home and Wardrobe by Sasha Duerr for ideas on new experiments. Continuing on the path of bones, I am going to try to use Yellow Onion Peels, Rose Petals, Turmeric, and of course cyanotype images to create geometric prints on the many bones we've found in Utah. The flora of Utah's desert and mountainous landscape is beautiful and will make unique prints different from the exact images I tried to produce for my thesis. Cheers, Lexi  Materials Needed to Cyanotype Print on Bones: Unflavored Gelatin - Knox Brand is found in most grocery stores Bones Sandpaper Painters Tape Clear Tape Negatives or objects for a photogram UV Light Source - The sun or blacklight lamps Glass or Plastic Containers Stir Sticks Paint Brushes Standard Cyanotype Solution - Equal mixtures of Solution A and Solution B Solution A 400 ml water 100g ferric ammonium citrate, Add water until total solution is 500m Solution B 400 ml water 40g potassium ferricyanide Add water until total solution is 500ml 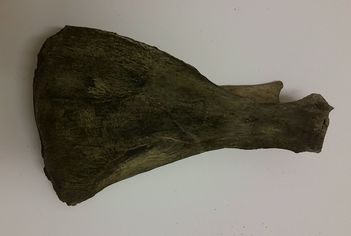 Preparation of Bones for Cyanotype Acquiring Bones The easiest way to acquire bones is by ordering off of Ebay or Etsy where you can find clean bones which can be printed on as soon as they arrive. A second method is finding hunters or farmers who have animals, and ask them where they dump their bones or sickly animals. These options are ideal because the bones you are using will be clean and dry, thus easier to print on. 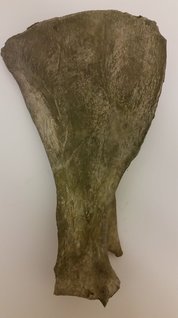 Cleaning Bones Once you have your bones, make sure they are cleaned by soaking them and gently scrubbing with a sponge in warm water. This will remove any excess grime and debris. Preparing the Surface After the bones have been washed and dried, select the section you would like to print on, tape off if necessary, then use sandpaper to remove bone flakes or growth from the area being printed. Brush or sponge off dust created during sanding. 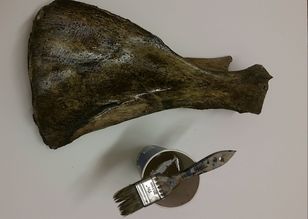 Applying Gelatin Next, you will prepare your bones with gelatin. The gelatin is essential to seal pores in the bone and provide a layer for the cyanotype fluid to sit without soaking in. Also without gelatin the images created will be less clear and unpredictable. To use the gelatin, warm up water and pour in one packet of gelatin for every cup of water used. Stir until the powder completely dissolves. Brush a thin layer of the gelatin solution onto the section you will be printing on.. Allow the first layer to dry, and then add 1-2 more layers of gelatin onto the bone; the younger a bone is, the less coats it needs. Note: If you can dip the whole bone into your gelatin you can.  Cyanotype Printing on Bones Applying Cyanotype Once all layers of gelatin have dried, brush cyanotype fluid onto the bone making sure to completely cover the surface but not oversaturate it. Allow the bone to completely dry in a dark space, this will be around 1-2 hours. Note: Due to the porous nature of bones, you should print on them within 48 hours of coating the materials if possible. After long periods of time, image definition will decrease or be impossible. 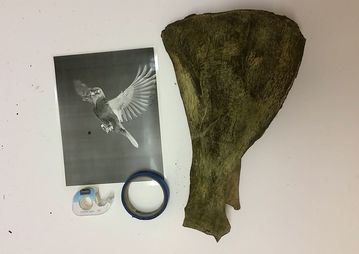 Applying a Negative To create a clear image, the negative should be touching the bone as much as possible, however, because bones are not flat like paper, it is difficult to make the negative touch all surface area. By using clear tape, one is able to cut the negative apart and reassemble it onto the bone. Painters tape can be used to create designs and adhere the edges of the negative.Note: Because applying the negative is a destructive process, using a printed transparency is recommended 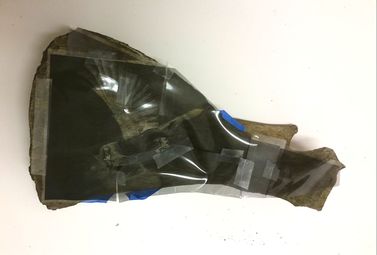 Printing on Bones Exposure times ranged from 1 - 3 hours outside on a sunny day. Inside with a black light lamp, exposures took up to 6 hours. With a black light oven, exposure times ranged from 1-3 hours Continual monitoring of the bones as they exposed was essential. When the darkest areas turned a silver grey/dark blue color, the image was properly exposed to achieve a vibrant blue color. 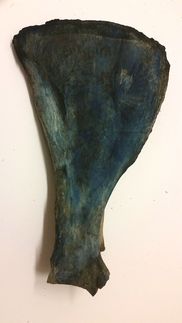 Rinsing the Bones After exposure, rinse out undeveloped solution with lukewarm water and let dry. Younger bones take less time to rinse out than older/ more weathered bones. The longer bones are rinsed, the more solution will be washed out regardless of level of exposure. It may take multiple cycles of rinsing and drying to achieve optimal contrast. Note: The print will dry darker than it appears when wet. Final Notes Because cyanotype printing is an alternative process, no two images will be the same. Unpredictability should be expected. This guide is from personal experience. The following images are the same transparency printed three times.
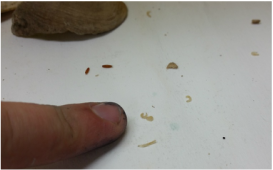
Well, My "update blog on Wednesday's" failed but I swear it's because I've been busy. First order of business, did you know that fly's like to lay their eggs in bone marrow? I didn't, until I was cleaning off some bones and all of a sudden maggots were crawling out of them. I put larger bones back in a trash can to continue natural cleaning and took a risk with some smaller bones to start printing....But they still had maggots in them. Maggots resistant to hydrogen peroxide, and cyanotype chemicals, and indigo dye.
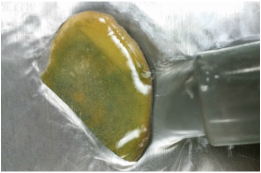
Second on the agenda, cyanotyping bones is going to be a bit more work than I hoped for. I discovered that bones are super porous, therefore soak up the cyanotype chemical really quickly. When I tried to expose an image onto the bone chips, The chemical was deep in the bone, so the exposed area was very blurry. When I tried to rinse out the test bones, the unexposed chemical (yellow in the picture) wouldn't leave the bone because of how quickly it had soaked in.
To remedy this, Scott suggested using a gelatin coat on the bones to prevent chemicals from soaking into the bone itself. Gelatin has been used in photography for a very long time to hold light sensitive chemicals on paper so I am hopeful that it will help remedy my exposure issues. 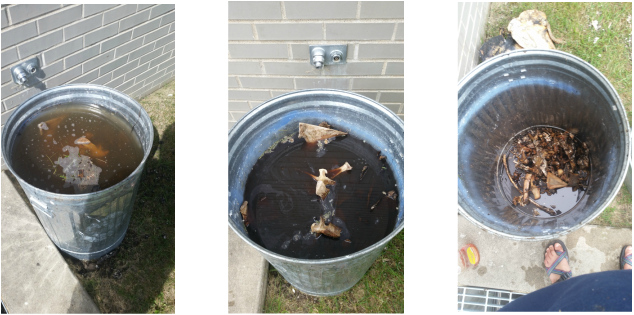 Left: Bones first day Macerating. Middle: 2 weeks Macerating. Right: Bones after dumping out water. |